Raymarching tutorial 0: Intro to shadertoy
We will start by getting out feet wet by using shadertoy. In this site you can code a pixel/fragment shader that is used to calculate the color of each pixel. We are going to start with something simple: drawing a 2D image. Do you remember our goal?
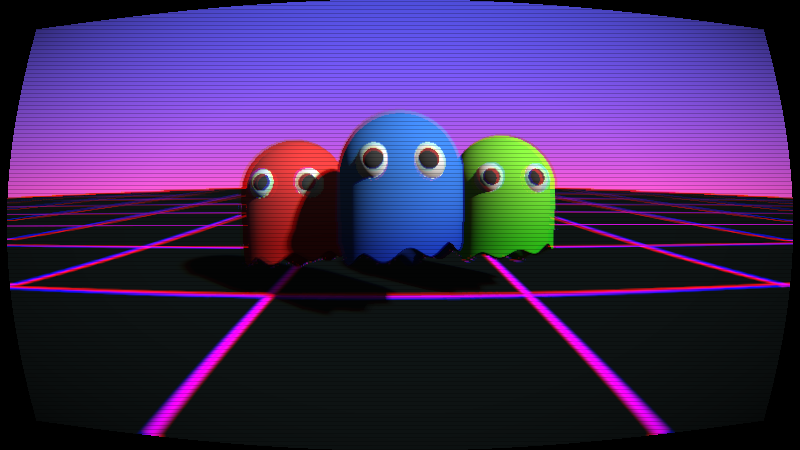
Take a look at the ground. Do you see the pattern on the floor? those tiling squares? That’s what we are going to be doing today! Feel free to skip this part of the tutorial if you are somewhat used to shaders already.
Disclaimer:
- This is NOT a tutorial on glsl or how to write shaders
- I am still assuming some prior knowledge with shaders
Getting used to the environment
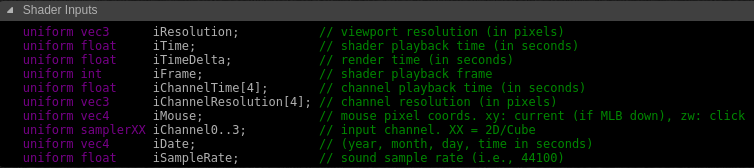
On shadertoy we have a basic function called mainImage in which we need to output fragColor. Lets take a look at all the possible inputs we have:
We can actually get some UVs for our texture just by using:
void mainImage( out vec4 fragColor, in vec2 fragCoord ) {
    vec2 uv = fragCoord / iResolution.xy;
    fragColor = vec4(uv, 0.0, 1.0);
}
Lets start with a basic template:
vec3 black = vec3(0.0, 0.0, 0.0);
vec3 pink = vec3(1.0, 0.0, 1.0); // 100% red, 0% green, 100% blue

vec3 getColor( vec2 uv ) {
    // We will be adding some code here soon
    return black;
}

void mainImage( out vec4 fragColor, in vec2 fragCoord ) {
    vec2 uv = fragCoord / iResolution.xy;
    vec3 color = getColor(uv);
    fragColor = vec4(color, 1.0);
}
Painting the outlines
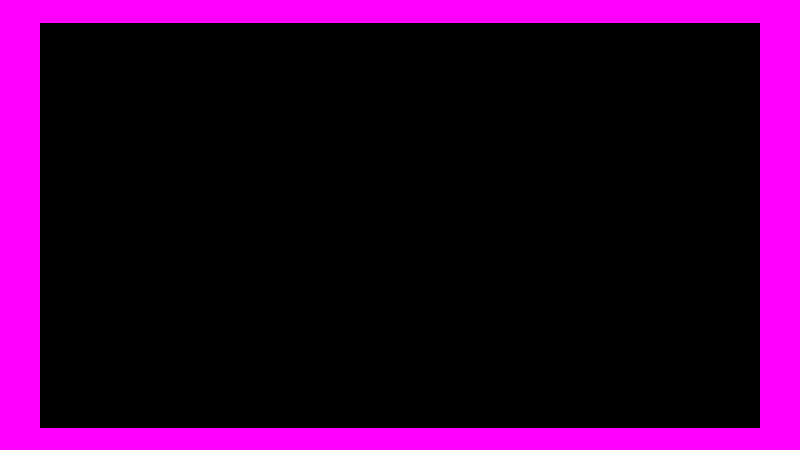
Now lets try to render a square outline on the edges of the image. The easiest thing to do is just using some conditional to paint these regions in pink.
vec3 getColor ( vec2 uv ) {
    if ((uv.x > 0.95 || uv.x < 0.05) ||
        (uv.y > 0.95 || uv.y < 0.05)) {
        return pink;
    } else {
        return black;
    }
}
But that is not how we usually code in shaders. We can start introducing a couple changes.
First of all, having to define 0.95 and 0.05 as the boundaries for each side is not ideal.
vec3 getColor ( vec2 uv ) {
    vec2 distanceFromCenter = abs((uv - 0.5) * 2.0);
    float maxDistance = max(distanceFromCenter.x, distanceFromCenter.y);

    if (maxDistance > 0.9) {
        return pink;
    } else {
        return black;
    }
}
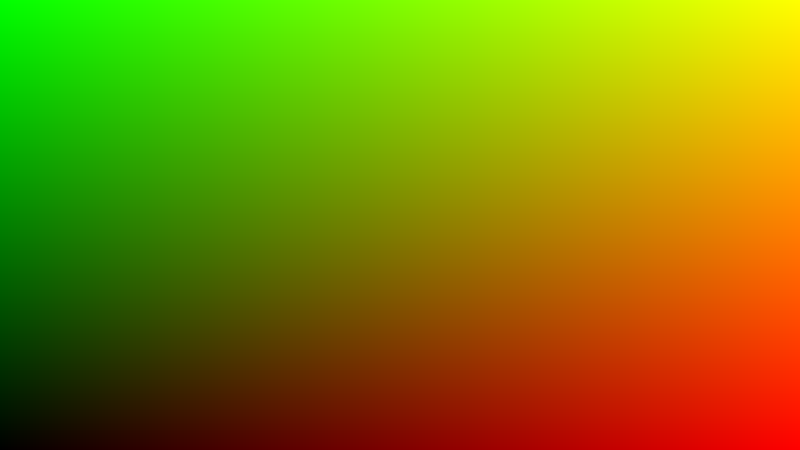
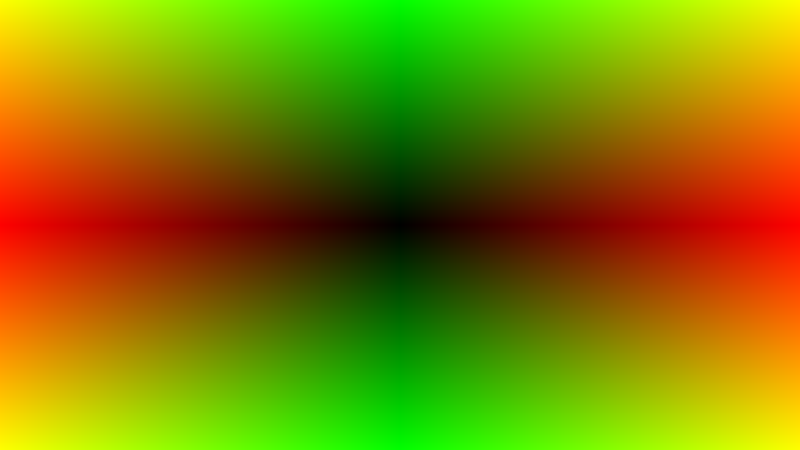
The ouput is exactly the same as before. Take a look at this.
uv - 0.5is shifting the whole uv so that instead of going from[0, 1]it goes from[-0.5, 0.5]on the screen.- Then we multiply by 2 so that they go from
[-1, 1]. - Later on by getting the absolute value each uv goes from
1on one side to0on the center and1on the other side.
This is what the shifted uv looks like:
Next refactor: lets change that if statement. You might have heard branching is BAD like really bad for performance on shaders. Explaining the “why” and “when” of those performance implications is a completely different story maybe for another entire blog series. In a quick way, this used to be a much bigger problem on gpus a lot of years ago. In any case, our particular if statement is most probably NOT even branching!! The compiler is probably just going to translate our conditional assignment as a cmov instruction. In fact, if we were to use the ternary operator ? it would be guaranteed that it would be a conditional assignment. Then, you may ask… why should we change it?? First of all we could make it shorter and more idiomatic by using step but the actual reason to change it is because we could use smoothstep and get antialiasing basically for free:
vec3 getColor ( vec2 uv ) {
    float borderSize = 0.1;
    float aa = 0.05;

    vec2 distanceFromCenter = abs((uv - 0.5) * 2.0);
    float maxDistance = max(distanceFromCenter.x, distanceFromCenter.y);

    float border = 1.0 - borderSize;
    return mix(black, pink, smoothstep(border - aa, border + aa, maxDistance));
}
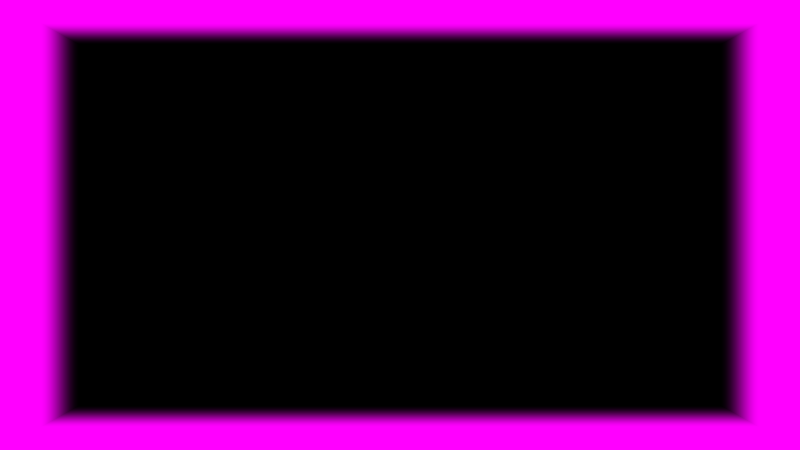
This is exagerated so that you can actually see the smooth transition from pink to black. I may not make much sense right now but it will be important later on.
Repeating the pattern
Now lets try repeating our pattern multiple times. Since we already have one outline painted we can just take advantage of math to repeat our uvs multiple times before sending them to the getColor function. Lets add a new function called repeatUV.
vec2 repeatUV ( vec2 uv, vec2 times ) {
    return fract(uv * times);
}

void mainImage( out vec4 fragColor, in vec2 fragCoord ) {
    vec2 uv = fragCoord / iResolution.xy;

    vec2 repetitions = vec2(5.0);
    vec2 imageUV = repeatUV(uv, repetitions);
    vec3 color = getColor(imageUV);

    fragColor = vec4(color, 1.0);
}
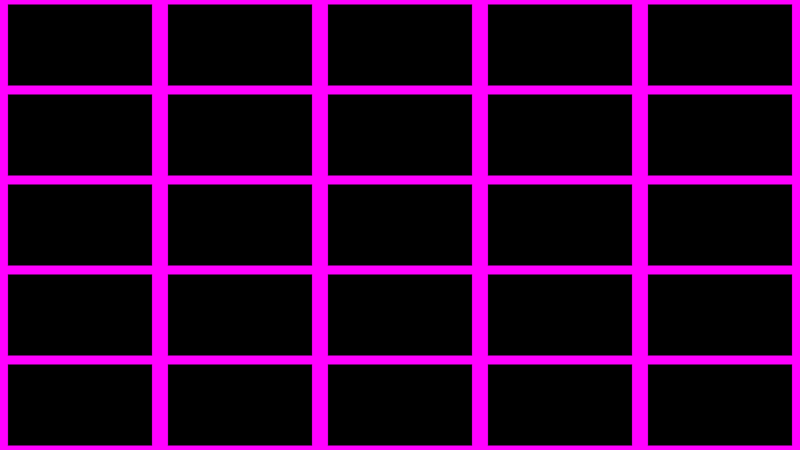
Lets visualize what repeatUV this is doing to our initial uvs:
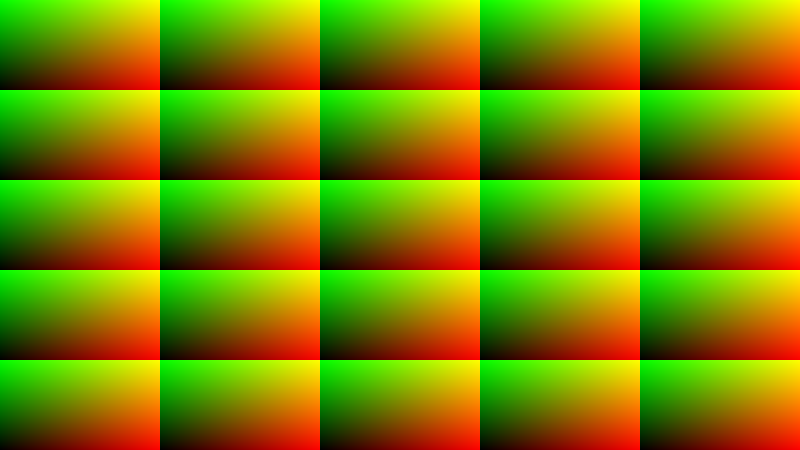
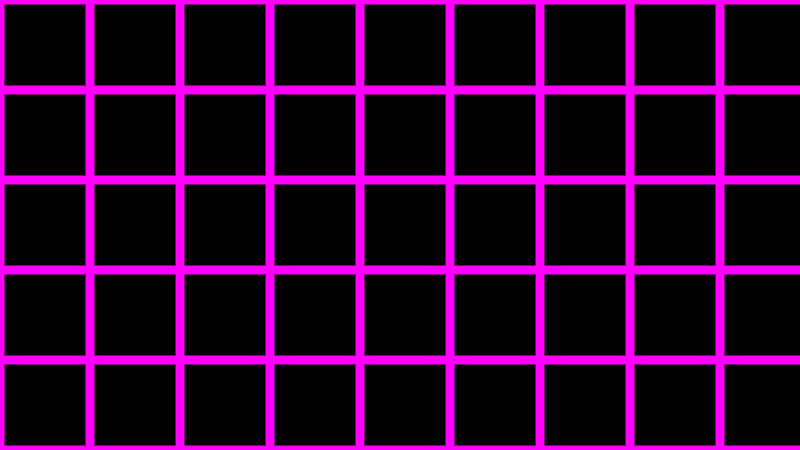
And magic, we get this image back:
Making the cells actually squared
Currently cells are not squared just because each uv component scales at a different rate because of the screen aspect ratio. When we map the texture to the actual geometry we won have this problem but if you want to fix it here you can just multiply the x component by the aspect ratio:
uv.x *= iResolution.x / iResolution.y;
So the whole shader ends up looking like this:
vec3 black = vec3(0.0, 0.0, 0.0);
vec3 pink = vec3(1.0, 0.0, 1.0);

vec2 repeatUV ( vec2 uv, vec2 times ) {
    return fract(uv * times);
}

vec3 getColor ( vec2 uv ) {
    float borderSize = 0.1;
    float aa = 0.01;

    vec2 distanceFromCenter = abs((uv - 0.5) * 2.0);
    float maxDistance = max(distanceFromCenter.x, distanceFromCenter.y);

    float border = 1.0 - borderSize;
    return mix(black, pink, smoothstep(border - aa, border + aa, maxDistance));
}

void mainImage( out vec4 fragColor, in vec2 fragCoord ) {
    vec2 uv = fragCoord / iResolution.xy;
    uv.x *= iResolution.x / iResolution.y;

    vec2 repetitions = vec2(5.0);
    vec2 imageUV = repeatUV(uv, repetitions);
    vec3 color = getColor(imageUV);

    fragColor = vec4(color, 1.0);
}
And this is the output: